")
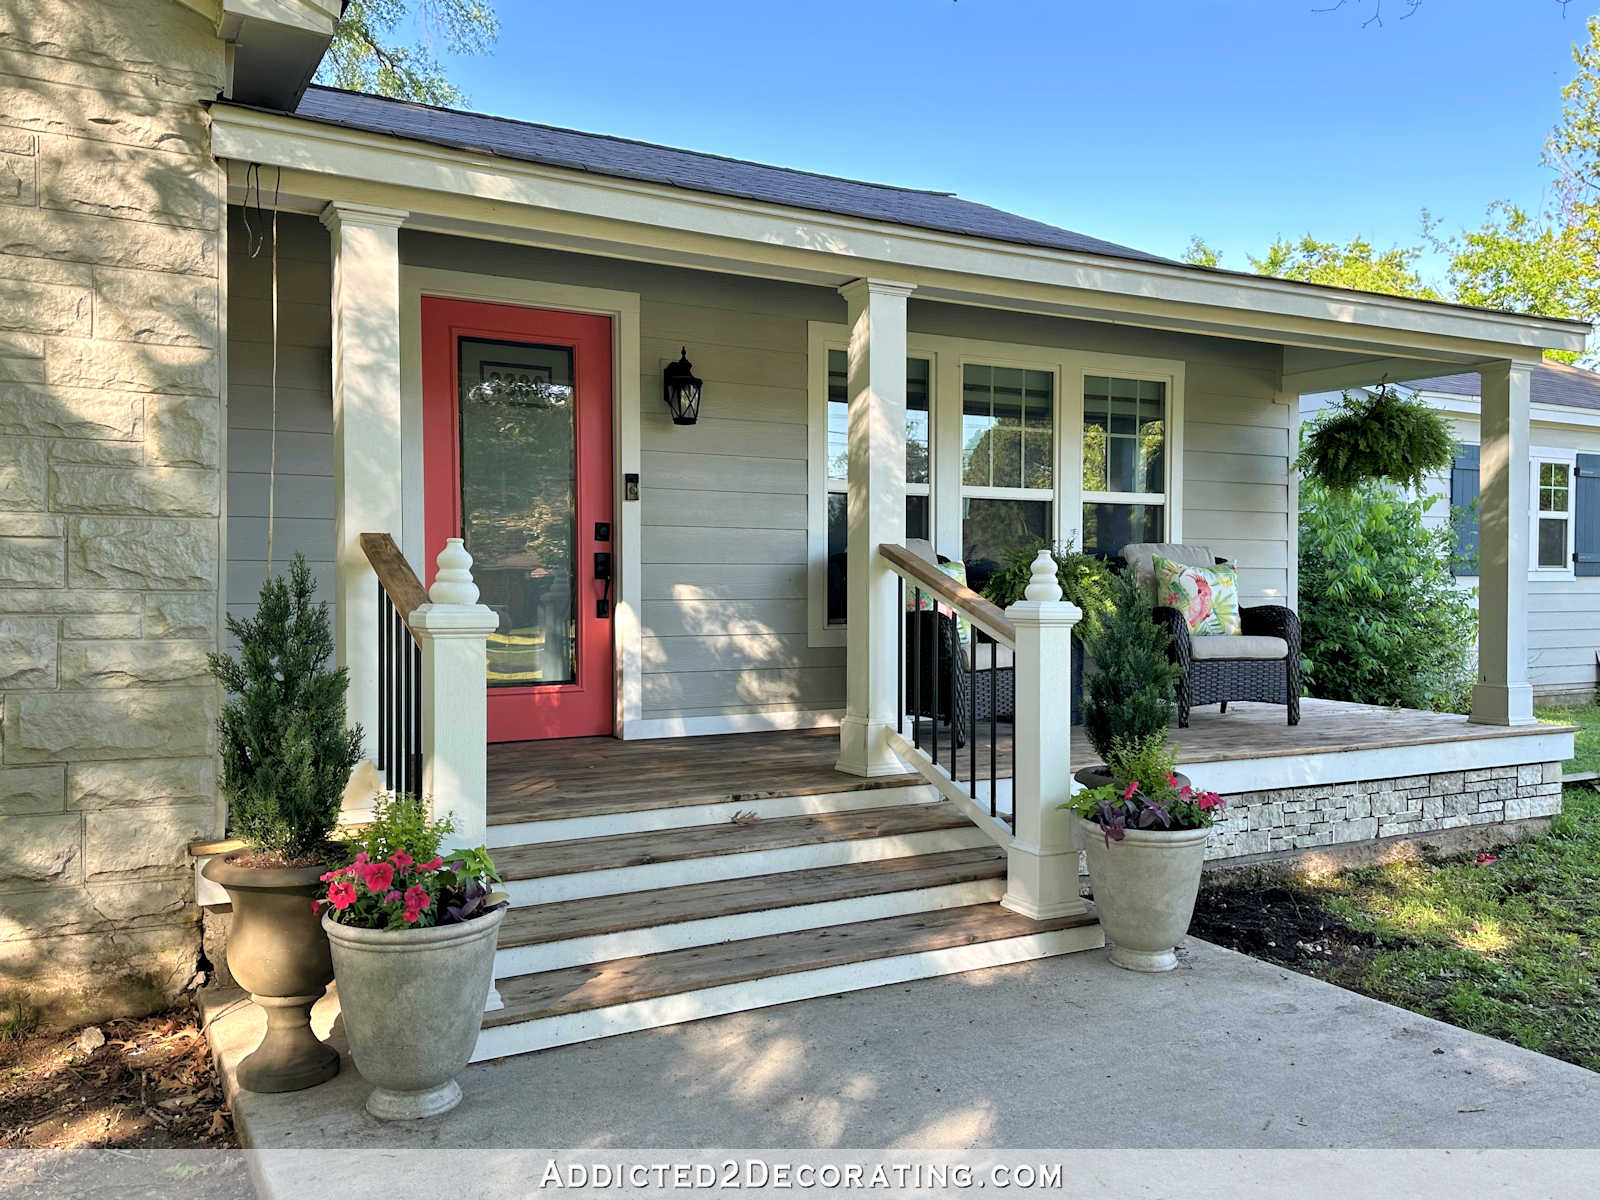
My front porch baseboard is finished, y’all! I’m very proud of how this turned out, but more importantly, I’m thrilled that after all these years we’ve lived in this house, the front porch is finished with baseboard. And best of all, the baseboard now matches the stone on the left side of the house.
This is how it turned out…
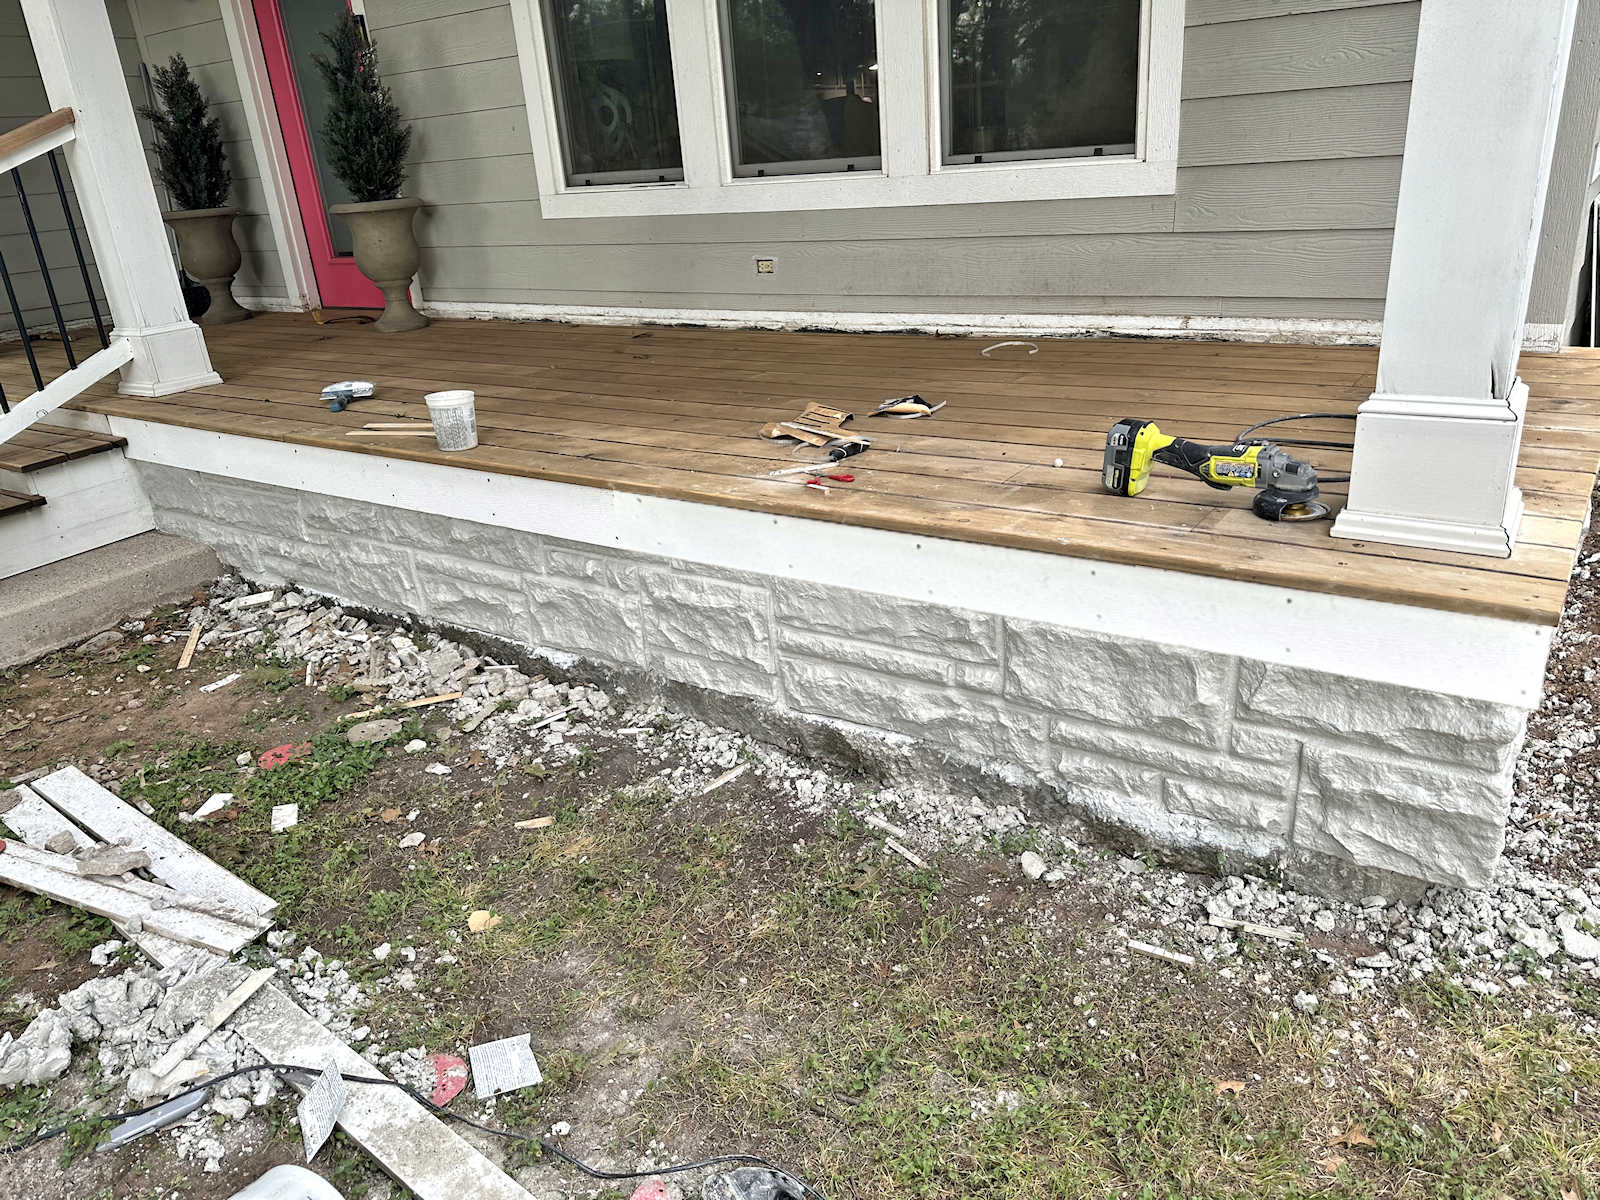
Just FYI, I didn’t actually finish installing the new fascia boards. But I didn’t want the missing and rotted fascia boards to distract from the first image of the finished baseboard, so I did a little photo editing to continue that new fascia board across the entire front. But in the rest of the photos of the finished skirting board, I didn’t edit them, so you’ll see the actual progress today, including the missing and rotted skirting boards.
So let me back up a little bit. In the last post about this project, I attached all of the faux stones to the concrete baseboard area of the front porch. At that time, it looked like this…

The next step was to add the mortar between the stones. For this I bought a bag of mortar and a mortar knife. And since Rapid Set Mortar sets so quickly (literally in minutes), I decided to add a little Set Control to the mortar to extend the curing time of the mortar. The Set Control worked very well.

I learned that as long as the mortar is inside the bag, the workability time is prolonged even more. I didn’t have any prepared or cured mortar inside the bag. So the key was to add the mortar a small section at a time, clean that section and then move on to the next section. If you mortared too large a section at a time, the mortar was much harder to clean when you got to the end of that section. As long as it was still in the bag, it could run for up to 25 minutes. That’s the longest it took me to get through a mortar bag, so I’m not sure how much longer it would have remained viable inside the bag.
I also found that the mortar knife was less than useless to me. I leave that to the professionals. I ended up using my most useful tool (my fingers) to clean up the mortar lines. I had much more success with that than trying to use that mortar knife.
This is what it looked like after all the spaces were cemented. Here’s the side of the porch…

And here is the front of the porch…

I really wish I had left it that way. I thought it looked cool like that!

But of course the purpose of this project was to make this stone look exactly like the stone in the rest of our house. I wanted the two sections of the front of the house to come together and look like this stone was original to the house. And unfortunately, the stone in the rest of our house was painted when we bought it. The color when we bought the house seemed very old and yellowed, so we painted both the siding and the stone gray. So, in order for the stone on this porch to match the rest of the house, it was necessary to paint it the same gray color, which is Sherwin Williams Mindful Gray.
So here’s the new stone porch skirting in Mindful Gray (and without the edit to add the fascia board all the way around)…

I had planned to finish the fascia boards and clean this entire area at the end of the day, but then I made the mistake of taking out my pressure washer to clean the front porch steps and sidewalk. And once I get out the pressure washer, I might forget about anything else I had planned for the day. Is there anything more satisfying than pressure washing? So instead of finishing the fascias and cleaning up the construction mess, I ended up pressure washing all the front steps, the foundation of the house, and the entire sidewalk. But today is another day and I will make these fascia boards and clean everything up.

Here is the small section to the left of the entrance steps.

Seriously, I couldn’t be prouder of how this turned out. I don’t think anyone could guess that these “stones” are not original to the house. And yet, I made them from scratch!

I made the textured silicone mats. I built the molds. And I poured each and every “stone” of the concrete.

Here’s a look at the porch plinth on the left side of the house. I love how this brings the stone to the porch and ties the two sides together now. It seems like it always had to be this way.

I am very happy to have finished this project. I don’t think my hands could have lasted another day working with concrete. They need a break! Today I’ll put up the fascias and clean everything up, and then I’ll be ready to move on to another part of the front porch project. I’m supposed to get the pine tar and linseed oil for the porch today, but I think I need to repair the pillars before I get to the pine tar. Also, I have a couple of other smaller projects I want to do on the front porch (mostly painting) before I put the pine tar on the cedar porch boards because once it’s on, each coat will take about 72 hours to dry. So the pine tar will be the last thing you do before finishing this porch makeover. But I love this progress so far!
I had to go back quite a ways on the blog to find a picture of the wood front porch with the simple stone baseboard. The only one I could find was before the front steps were built. But we can still see the comparison of the smooth concrete plinth with the new imitation stone plinth. I think it looks much better now! What a difference!


More about the exterior and patio of our house
see all exterior &
DIY garden projects

read everything outside and
garden blog posts
Addicted 2 Decorating is where I share my DIY and decorating journey as I remodel and decorate the 1948 upper that my husband Matt and I purchased in 2013. Matt has MS and can’t do physical work, so I do most of the house work myself. You can learn more about me here.

")

")