
A couple of days ago I shared with all of you that I had a crazy idea for our bedroom exterior door. Originally, there was a window here, but during our room remodel, I replaced the window with a door. And while I love the look of the door inside our bedroom, I really didn’t like how the outside of the door looked. Because it is in a section of our house that has Austin stone façade, and this section happens to be the most uneven section of our old house, adding a door here was a challenge. They had to cut the stone to add the door frame and then figure out how to trim it on the outside.
I worked with them at the time to find the best solution and this was the best we could come up with. I thought I could get by with that. I had convinced myself that I would be satisfied with it once it was all painted. But the more I looked at it, the more I hated it.
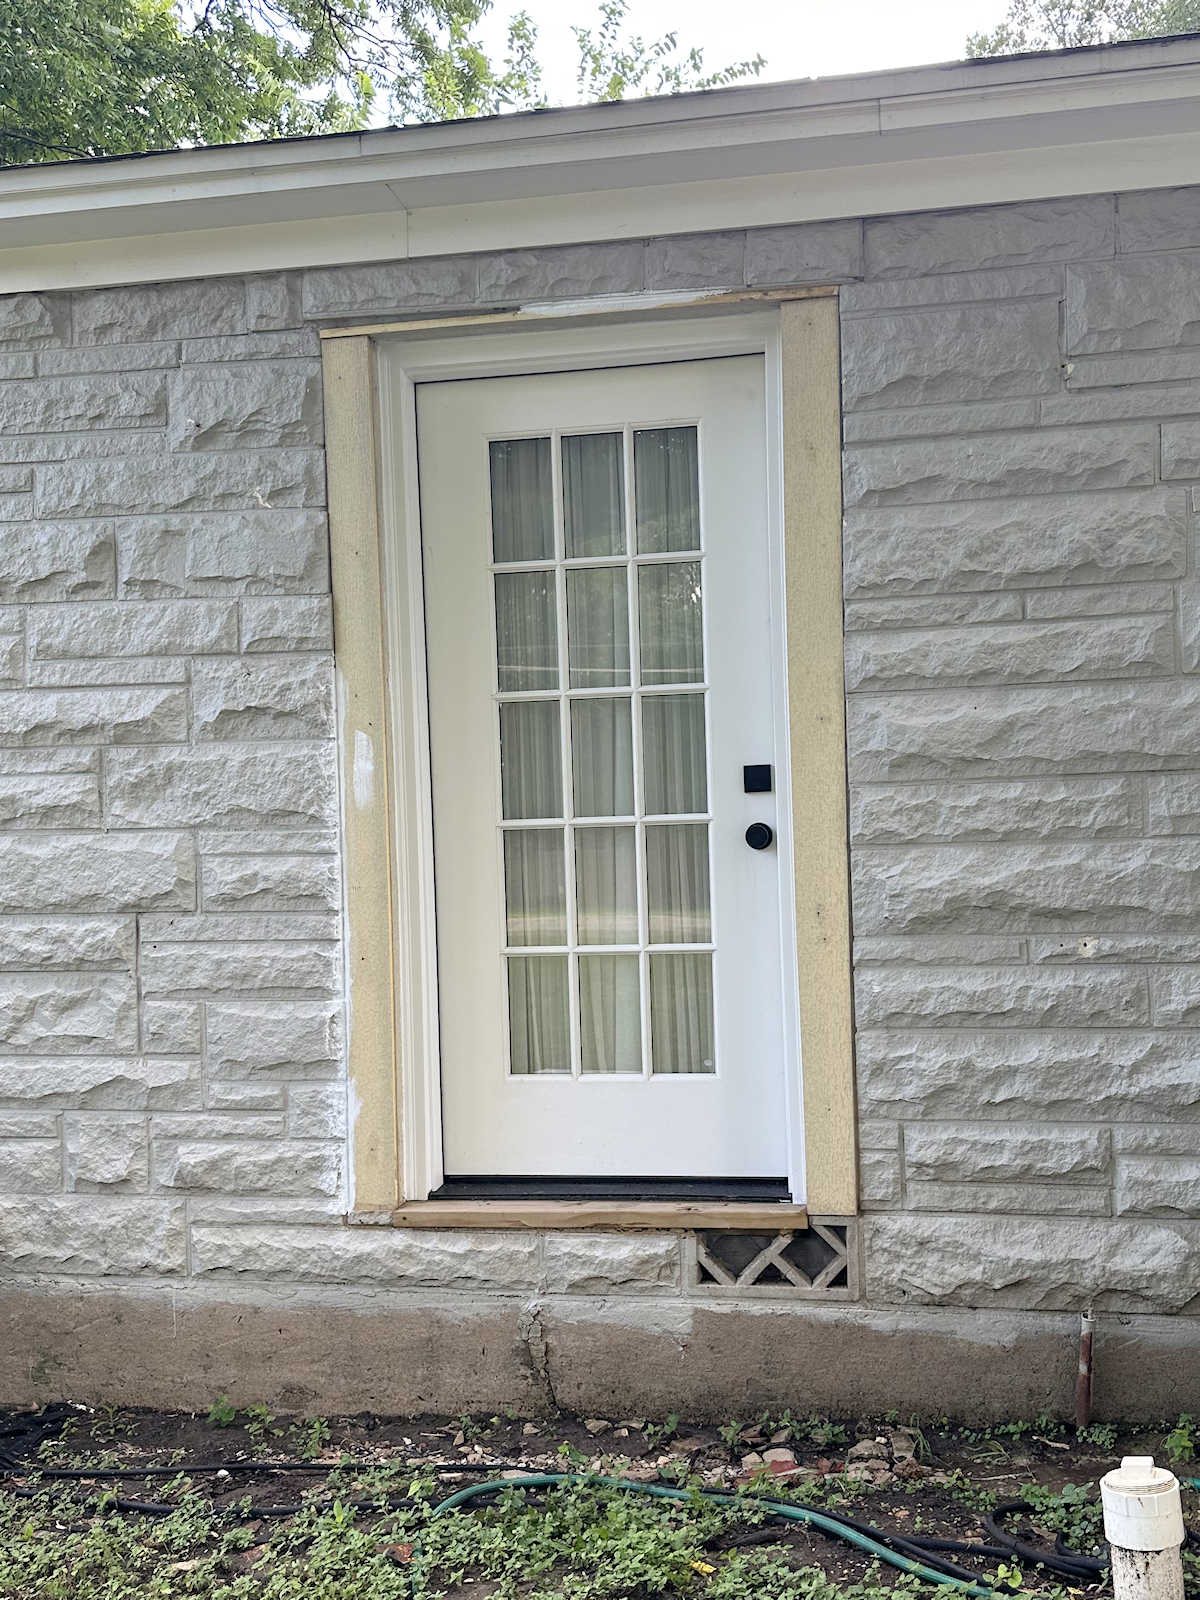
It has Hardie board moldings that are flush with the stone façade, and those Hardie board moldings wrap around the door jamb and meet the PVC molding that came on the door pre-assembled. But a major problem is that we couldn’t put matching moldings above the door. So the whole thing seemed awkward to me.

That door was installed eleven months ago and I have been trying to find a solution ever since. But since then, I did a very large concrete project on our front porch using concrete to create a faux stone facade so that the porch baseboard area matches the stone on the rest of our house.
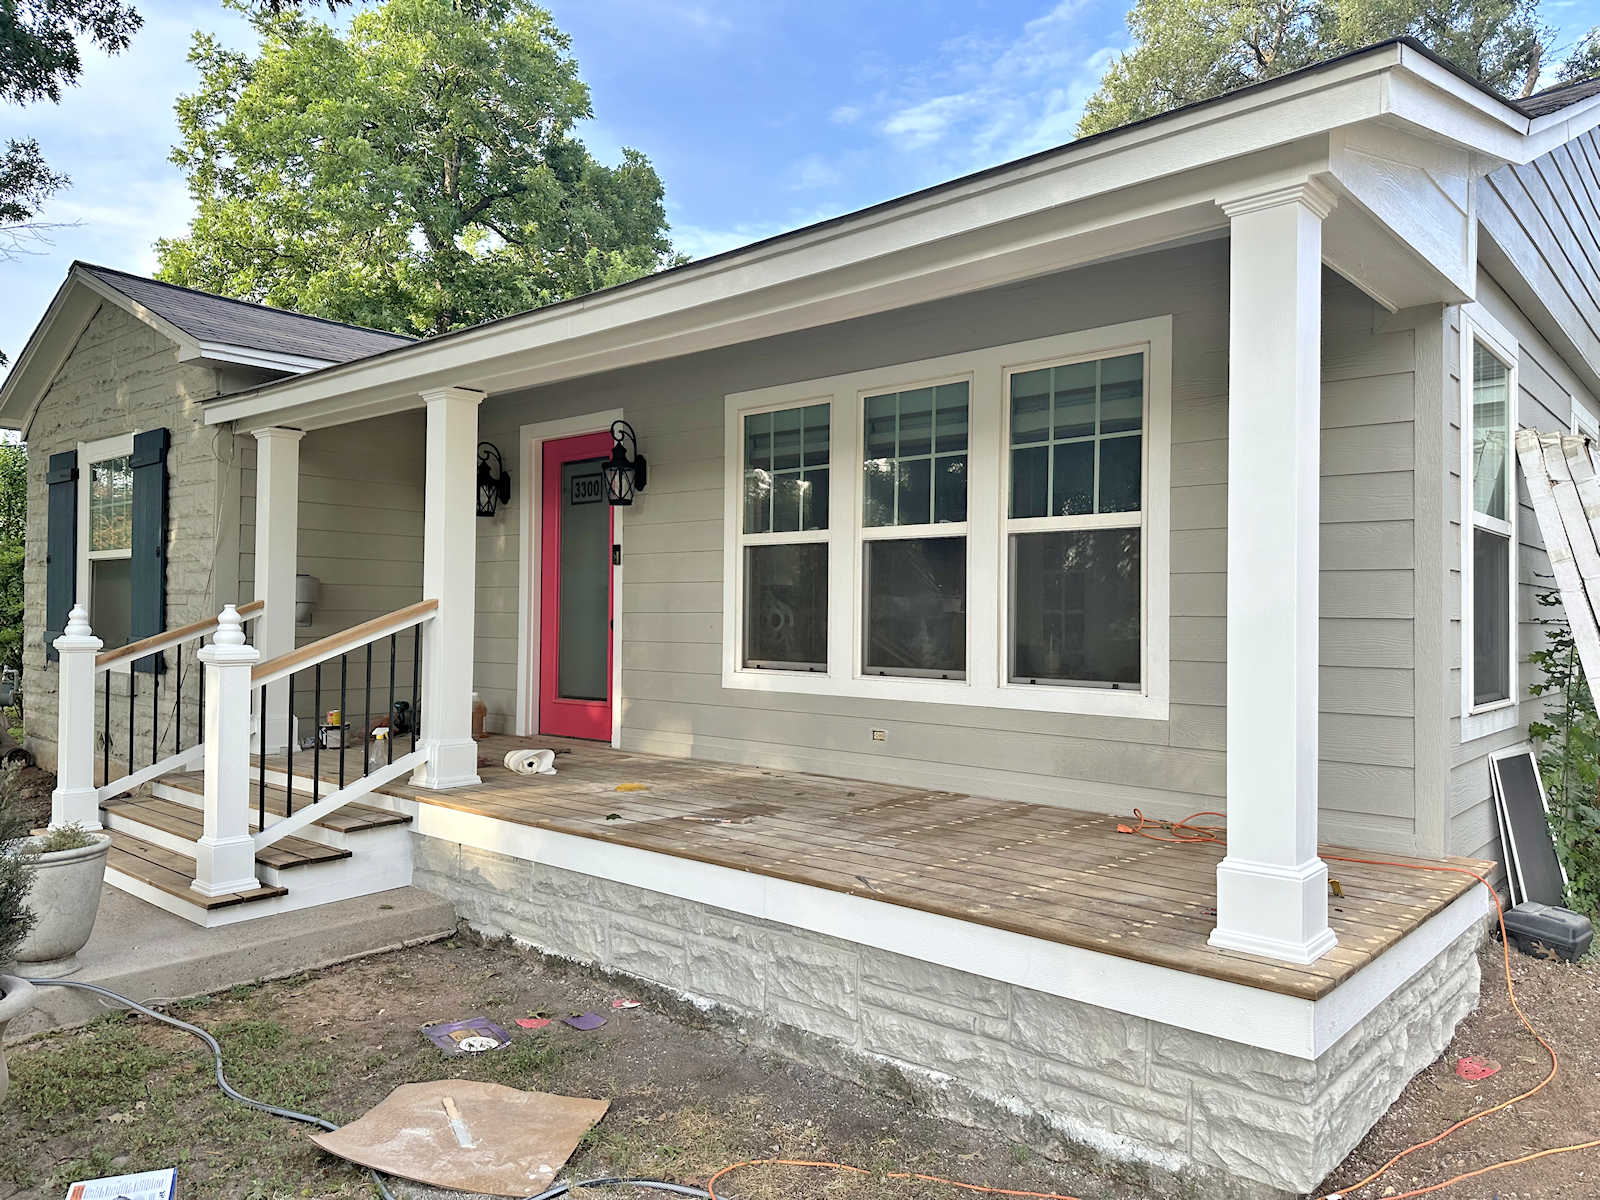
I learned a lot during that project and gained confidence working with concrete, which gave me an idea for this door. I decided to remove the Hardie dash trim and replace it with faux concrete stones. But I decided to try a completely different process than the one I used on the porch baseboard. On the porch baseboard, I created textured silicone mats from existing stones in our home, built a mold for each textured pad, and then poured each concrete stone separately. I then glued those faux stones to the porch using mortar. For this project, I decided to apply the concrete directly to the area and then shape the wet concrete to look like stones.
I started by removing the Hardie dash trim from the left side of the door just to see what I was working with. I was expecting to see the 2×4’s that had been used to frame the door, but I had forgotten that they had used 1/2 inch plywood on the door frame to build up that area a bit so the Hardie board would sit closer to the front of the stones.

Instead of removing them, I decided to leave them there, but I had a lot of holes to fill and a lot of waterproofing to do before I could get to the fun part of this project. I used Great Stuff expanding foam to fill the gaps.

I let it expand and cure for a few hours…

…and then I cut off the excess with a sharp serrated kitchen knife.
And then I went over those areas, as well as the nail holes and small cracks, with caulk.

When the caulk was dry, I did one more waterproofing step. I used my Semco liquid membrane…

And I applied it with a brush to the entire area, making sure the wood, the remaining Hardie molding on the jamb, and all caulked areas were completely coated.

I did that extra step not only for waterproofing but also because I didn’t want to put concrete on any porous surface that would absorb moisture from the concrete as it cured. So, this waterproofing membrane helped keep water in the concrete during the curing process instead of seeping into the dry wood.
Next, I decided on my pattern for the faux stones. I wanted some of the new faux stones to be a continuation of the original stones, while others were separate, individual stones. In other words, I didn’t want the finished door to look like I had just added a series of five-inch stones around the door. I then decided which original stones I wanted to continue around the door, and used my hand grinder to polish about two inches of the face of those stones so I could get to the bare stone. The stone on our house is painted and I couldn’t add concrete on top of the paint. I then needed to expose the bare stone to give it a little “tooth” for the new concrete to adhere to.

You can tell by the color which ones I ground with my hand grinder. Our house paint is gray, so these whitish areas are the areas I polished.

Next, I needed to place a strip of galvanized diamond mesh over the areas where I wanted to place the concrete. Without this, there was no chance of the concrete holding up. I found this in the concrete section of my local Home Depot. It comes in one 27″ x 96″ piece, so I had to use my tin snips to cut it to the size I needed, which was 7″ x 89.5″.

And then I used 2″ exterior screws to screw the batten to the area. I made sure to completely cover all the wood and Hardie trim, wrapping it to match the PVC trim on the pre-assembled door.

After placing that strip across the entire area, I went back and added more screws in the areas where it wasn’t flat against the wood. If it looked like it was leaning or giving way, I added a screw.

With the bar set, I was finally ready to mix some concrete. I used Rapid Set Cement All for this project, which is the same thing I used to pour the faux stones for the front porch. I really like Cement All because it uses very fine sand as aggregate, so it can be blended to a very fine edge, which was important in creating the stones. But I also used it for my base layer. Using a 6″ x 2″ trowel, I covered the lath with the concrete, making sure to push the concrete into the lath very well. I wasn’t worried about the look of this scratch layer. In fact, the harder the better. The roughness gives the next layer (i.e. the fake stones) something to hold on to.

Here’s a closer look at that scratch layer. You can see that before adding the concrete, I put painter’s tape on the edge of the white PVC door to protect it from the concrete and to have a clear idea of where my “stones” needed to stop.

Once that base coat dried for about 30 minutes (again, I was using Rapid Set, which hardens very quickly), I was ready to start creating the stones. This was the fun and creative part I was waiting for, but it was also a little challenging because the time period to work with Cement All is very short. I mixed enough to make one stone at a time, so I used a quart of dry cement. All mixed with 6 ounces of water. Once it was all mixed together, it was too fine to form stones, so I had to wait a few minutes for it to thicken. Once it was thick enough to handle without sticking to my fingers, I was ready to spread the concrete over the base layer and begin shaping it into the stone. That only gave me a few minutes to get the concrete into place, give it the shape and texture I wanted, and cut off the excess at the top and bottom with my trowel. Once I got close to that 15 minute mark, it was already too difficult to shape and texture. Again, from the point where the concrete is set enough to manipulate and shape into stone to the point where it is too difficult to shape and texture, it is only seven minutes. It’s a little stressful, to say the least. But it’s also fun.
I started from the bottom and went up. I did this because I really had no idea what I was doing and was pretty sure I would need to make a few stones before I felt comfortable with the process. So if I make a mistake with the first stones, they might eventually hide behind some pretty pots. And indeed, my first “stone” seemed ridiculous. All I could see was some sort of Jabba the Hutt smiling face looking at me. But because concrete hardens so quickly, it wasn’t possible to get rid of that face. (I returned my grinder and remodeled it later). The second “stone” was better, but still not great. Again, I waited too long to try to texture it and by then (literally, within ten minutes), it was too difficult to get right.

By the third stone, I was understanding my process and technique much better. However, I’ll still go back and fix some of the weird bits with my grinder before I paint these faux stones.

Because the preparation was too long, that’s as far as I went with the stones. But I got far enough to see that my plan is definitely going to work.

This is what it looked like this morning. It’s all dry, but you can see that some parts (the thinner ones) dried much darker than the rest. That’s because it is very thin and cures much faster than the thick parts. It is imperative to water cure Rapid Set Cement All while it dries, so I kept my water sprayer nearby and kept it very wet for an hour. But those thin, feathered edges still healed very quickly. I think it will be fine once the concrete is primed and painted so it doesn’t get wet in the rain.

And while I want to fix some areas with my grinder now that they’re cured, overall I’m very pleased with the look. I think this will look much better than that awkward Hardie trim around the door!
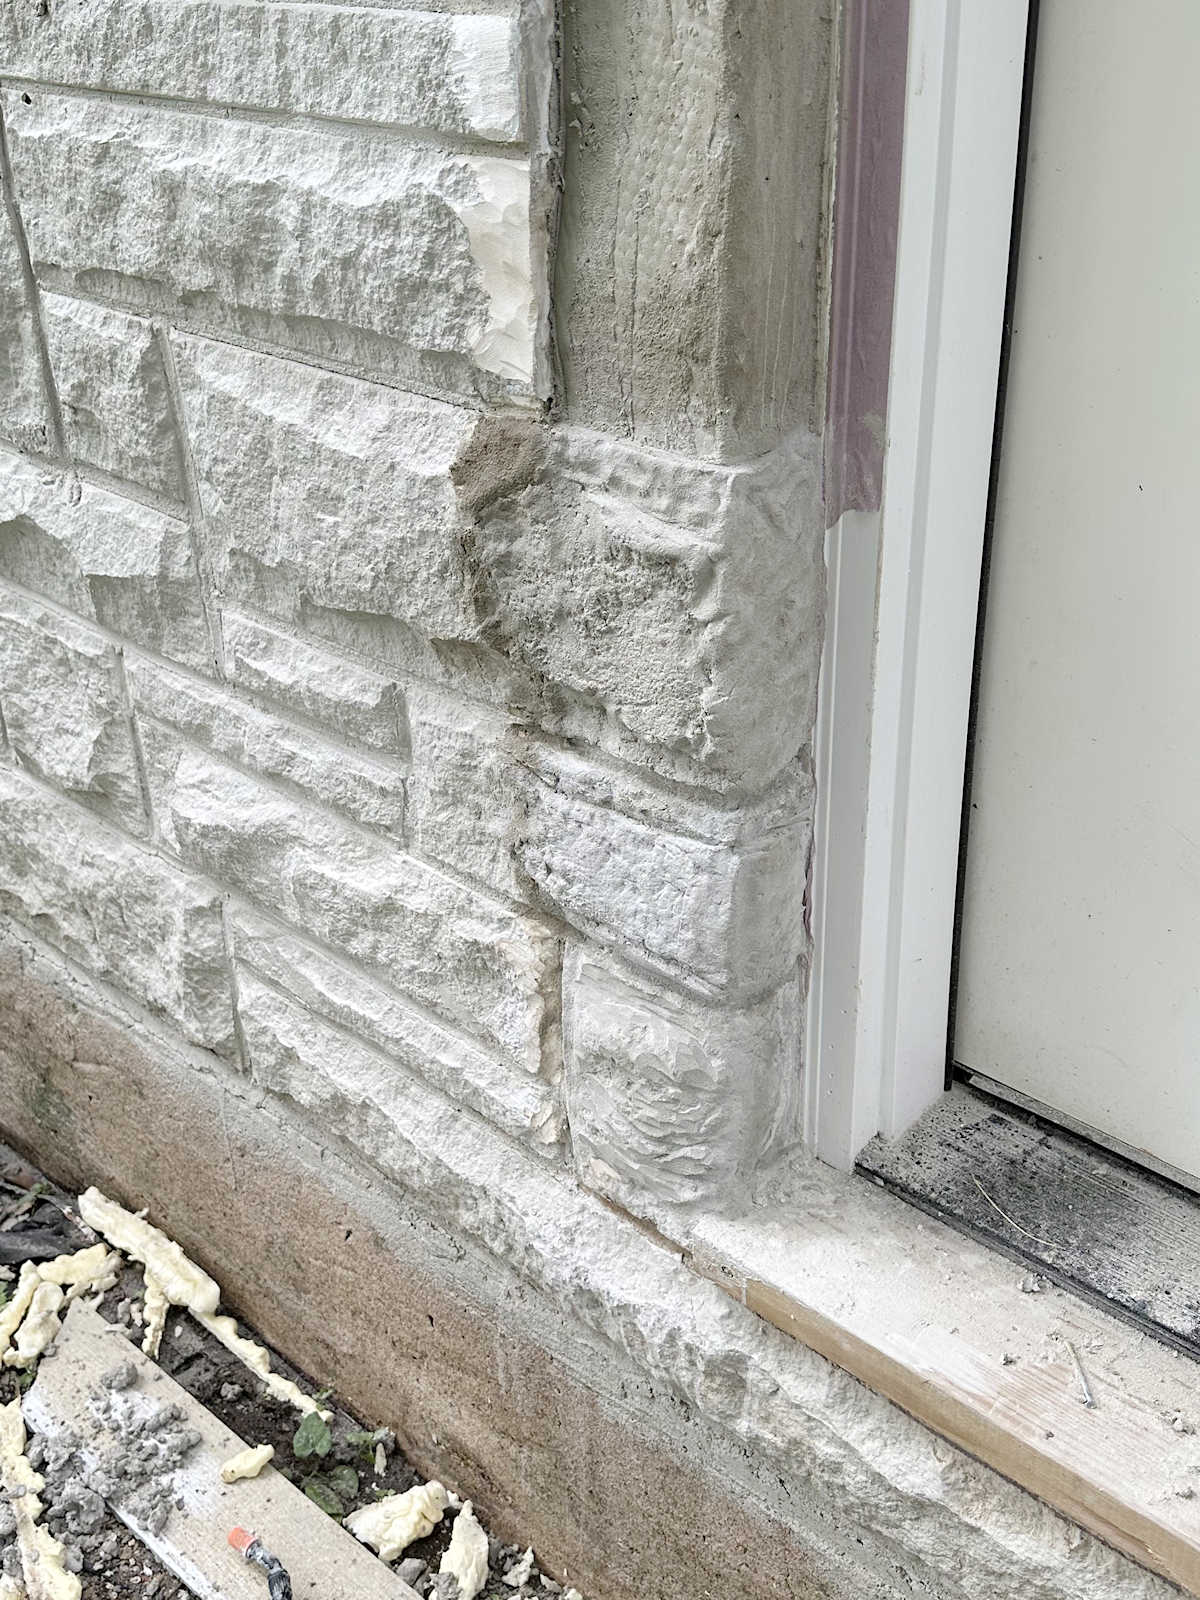
Here’s a side-by-side view of this gate area then and now. And keep in mind that they will still be primed and painted. But isn’t this much better?!


Addicted 2 Decorating is where I share my DIY and decorating journey as I remodel and decorate the 1948 upper that my husband Matt and I purchased in 2013. Matt has MS and can’t do physical work, so I do most of the house work myself. You can learn more about me here.


