
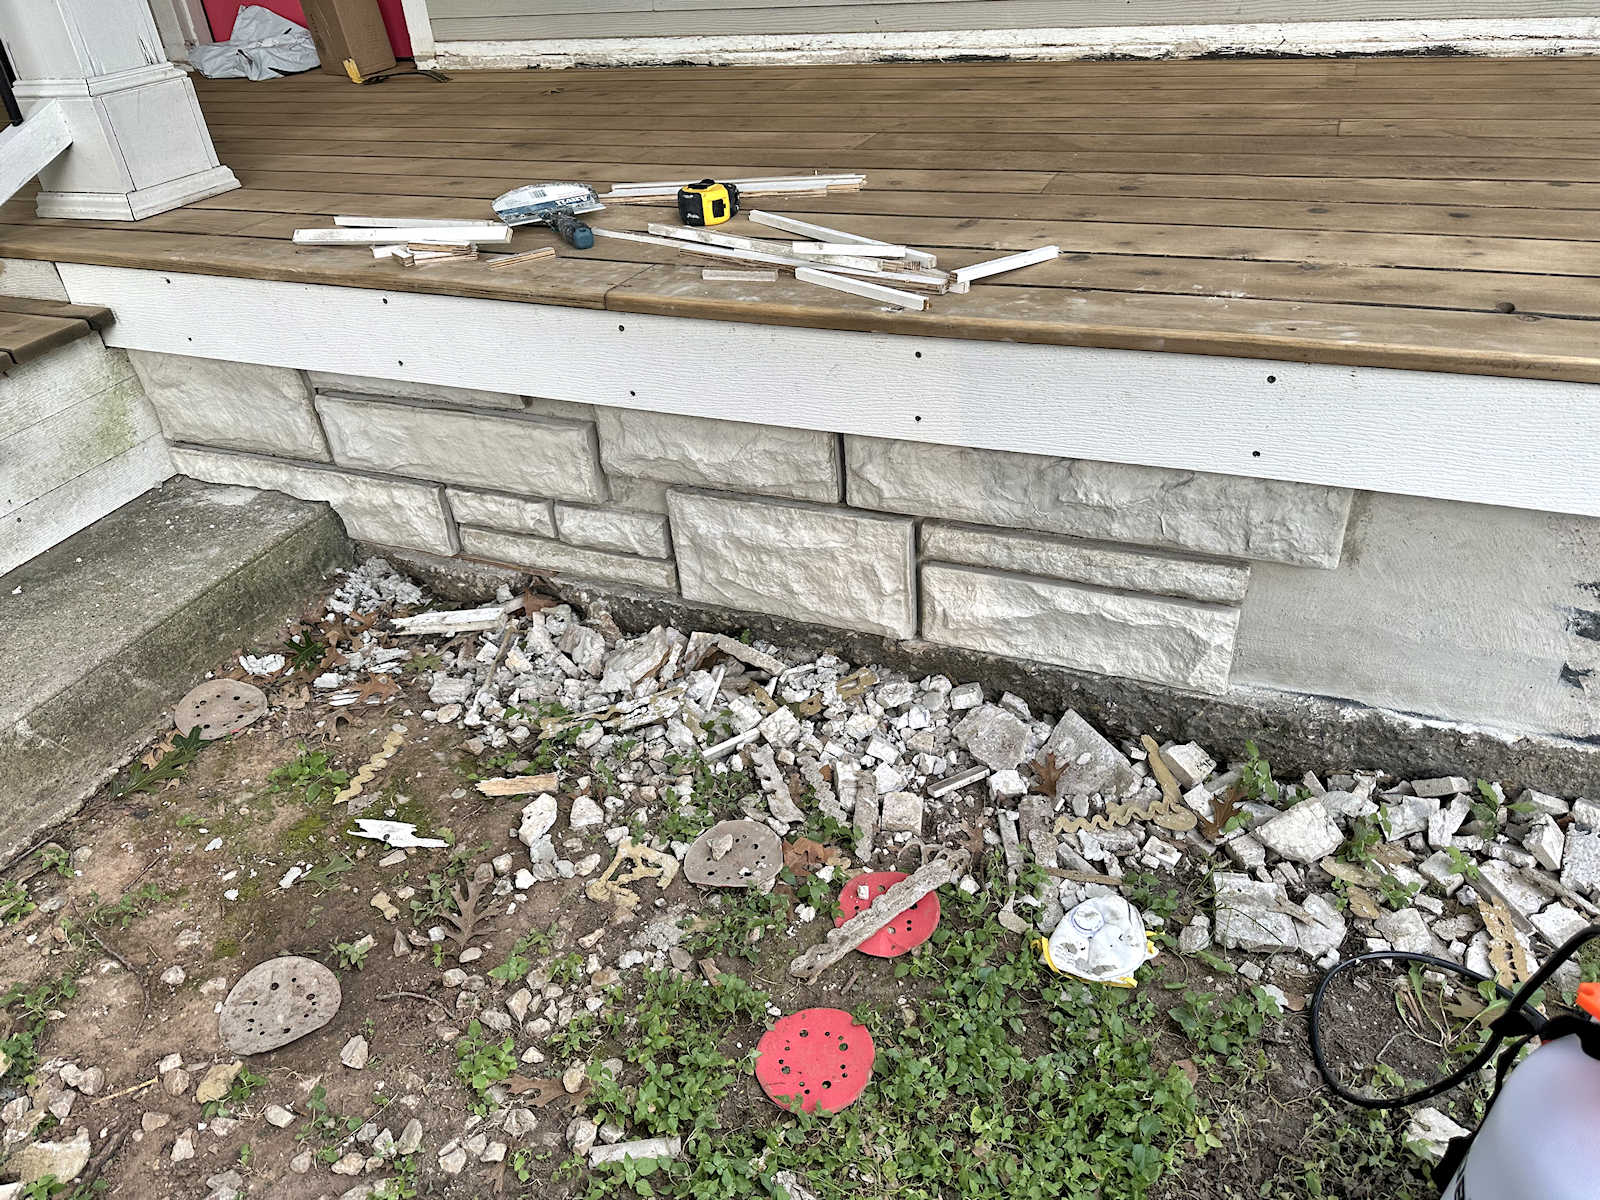
This front porch skirting project has been a long process, but yesterday I finally got to the point of placing the concrete faux stones I made in the porch skirting area. I didn’t make it halfway to the front, but I got pretty close to the middle. This is how it looks so far…
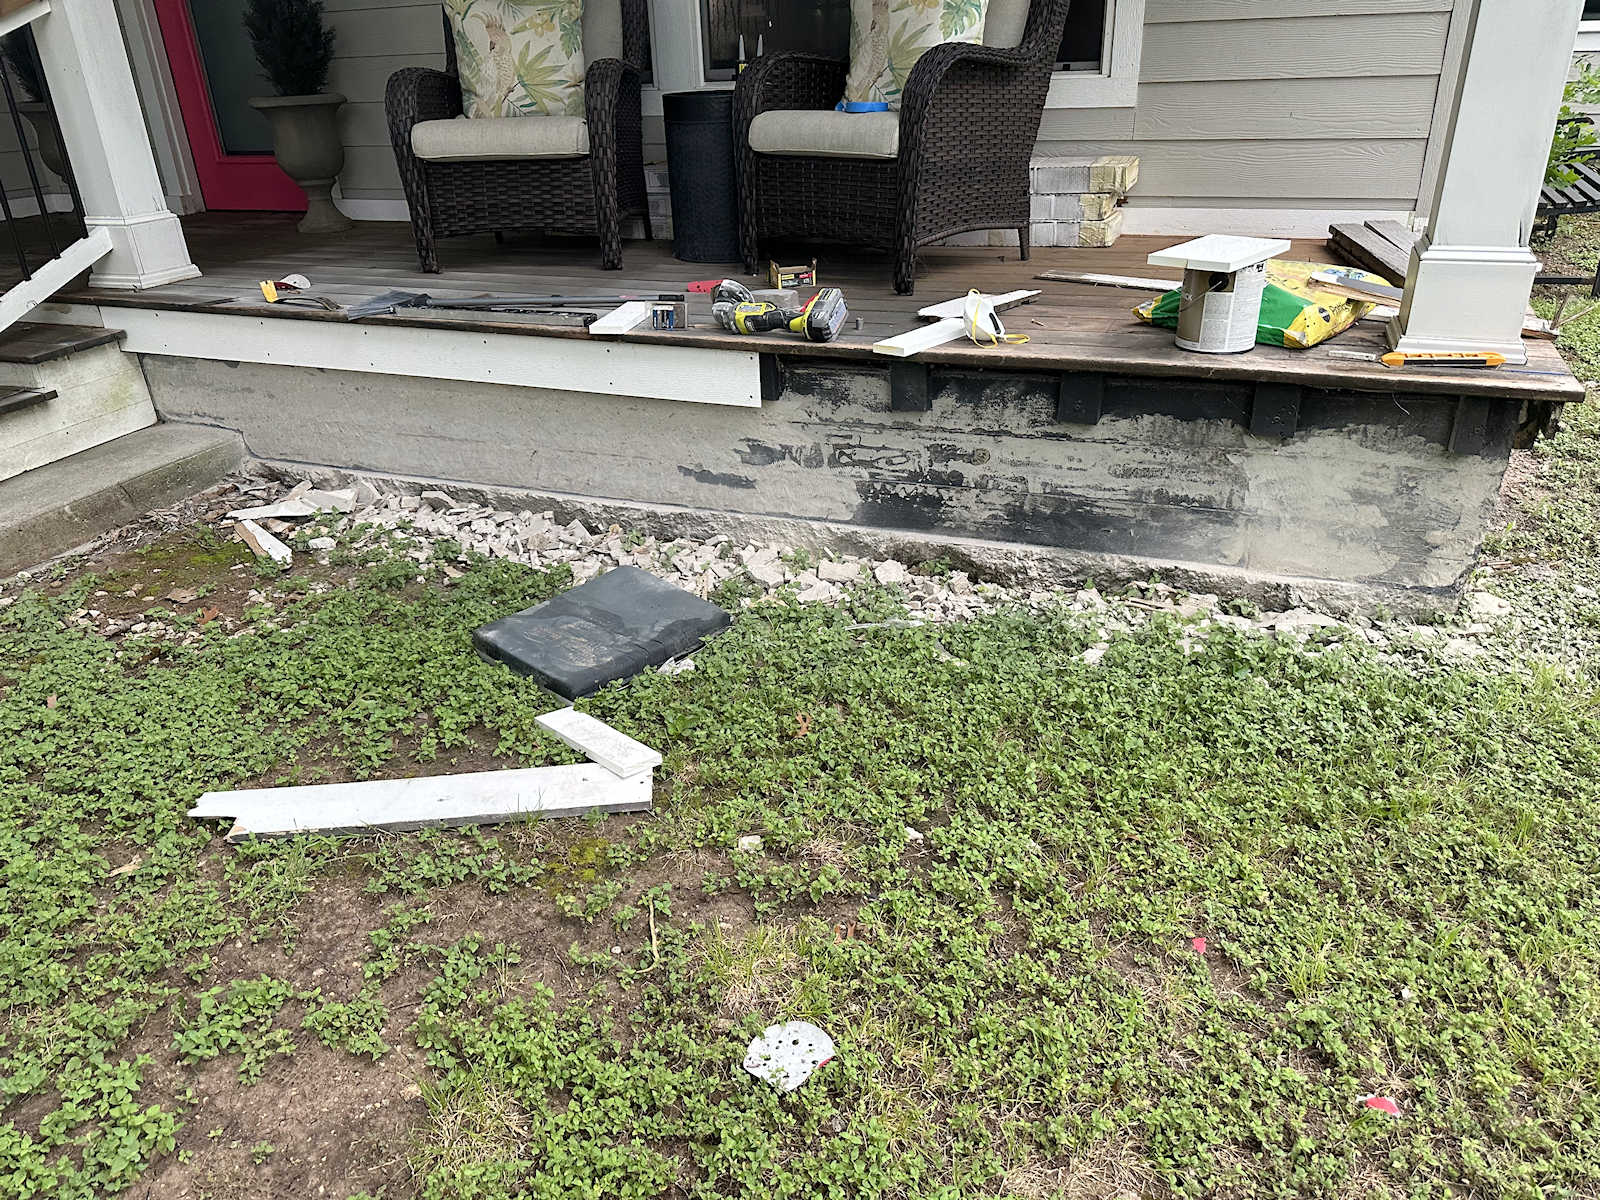
This is what the plinth area looked like when I started my job yesterday. I had used my hand grinder to grind the concrete in the baseboard area about halfway up the front. I still needed to polish the rest, but I was too eager to start laying the concrete faux stones, so I decided to start right away. But before I lay the rest of the stones, I’ll still need to polish the rest of the front to make sure all the paint and all the concrete ridges are removed.
To set the faux stone façade, I used Rapid Set Mortar Mix. And let me tell you, the name “Rapid Set” is true in advertising. This hardens very quickly, so I mixed it in very small batches. Once it starts to set, you can’t add more water and try to dilute it and make it viable again. Once it starts to harden, just throw away the leftovers and start a new batch.

I was mixing such small amounts at a time that I used this 4 liter bucket from Home Depot and mixed the mortar with a handheld kitchen mixer.

I learned the hard way when I was making the faux stones that it is imperative to add the water to the bucket first and then slowly mix the concrete or mortar mixture. The mortar mix ratio is approximately 1 part water to 4 or 5 parts mortar mix. I found that a quart of mortar mix and a cup (8 ounces) of water worked very well for me. Since I was mixing the mortar in the garage and then taking it to the front porch each time, when I mixed it, walked up to the front porch, prepared the stone and the area of the porch where the stone would go, and was ready to butter the back of the stone, it was the perfect consistency.
To butter the back of the faux stones, I used this 6″ x 2″ trowel from Home Depot.

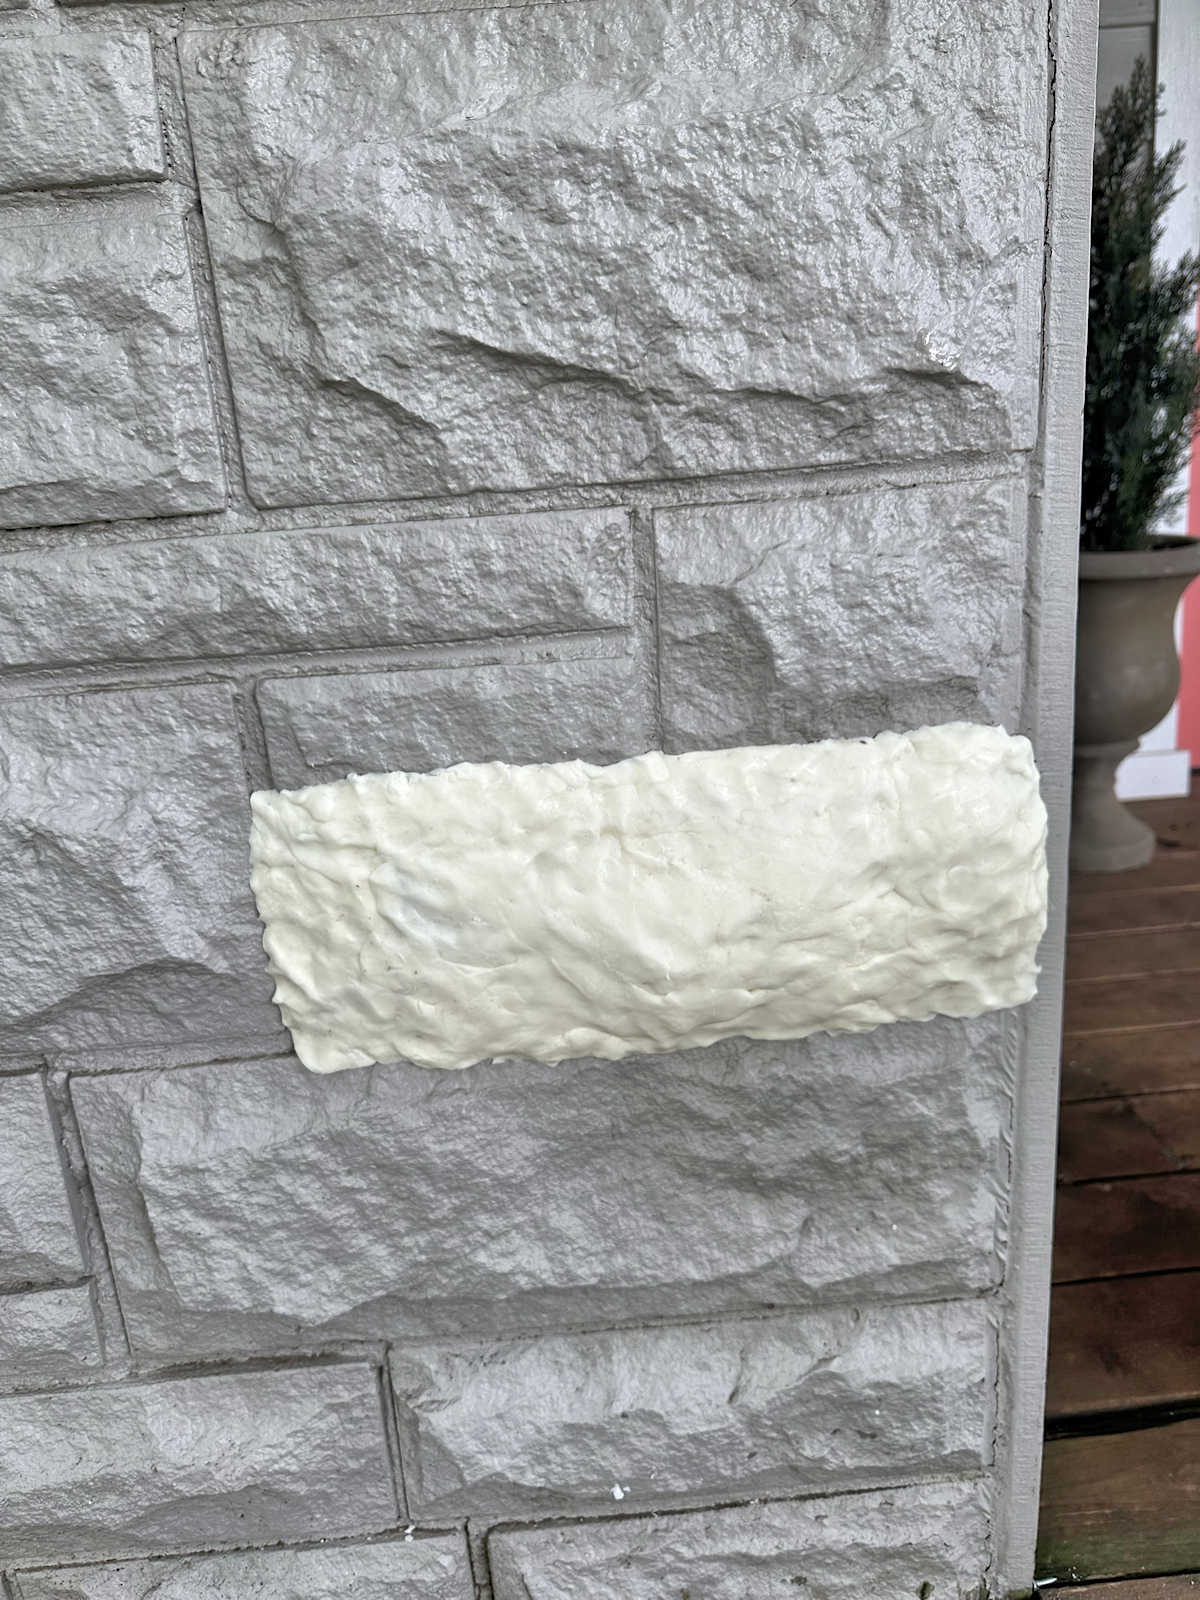
But before I started mixing the mortar for the stones, I first stopped the concrete on the porch. Patching simply means that you are putting a super thin layer of mortar on top of the concrete. The purpose is to fill in holes and cracks and smooth out problem areas. First, I sprayed the area with water and then used my hands (which I found was much easier and faster than trying to use a trowel on such a small area) to spread a super thin layer of mortar mix over the concrete. You can see the difference below in the area that is patched and the area that is the original concrete. You can still see the aggregate in the area that has not yet been patched, but you cannot see any aggregate in the patched section.

When I was ready to place the stones, I worked from top to bottom. I know this probably seems counterintuitive, but the reason I did this is because these blocks that the fascia boards attach to are all the same height and are all level. That made it much easier to just push the top row of stones against those blocks as a starting point and then work down from there.

If I had started from the bottom and worked up, it would have been more of a guessing game because this ridge at the bottom is not level at all.

But since the mortar sets so quickly, working from top to bottom was no problem. So here is the process I used. After patching the section that had been ground and smoothed with my hand grinder, I mixed a small amount of mortar. Then I used my handy tank water sprayer…

Then I sprayed just the section for the next stone…

And then I also sprayed the back of the stone…

I then used my trowel to smear the back of the stone with the mortar mixture. I didn’t get a picture of this because I had to work very quickly, but I made sure every part of the back of the stone was covered, and if I had to guess, I would say I spread the mortar about 1/2 inch thick on the back of the stone, but maybe just a little less than 1/2 inch. I then pressed the stone against the socket and gave it a good shake while pressing hard to make sure everything made contact. I then added my spacers (cut from 1/2 inch plywood) and clamped the stone in place.

In less than ten minutes I was able to remove the spacers and bolsters. That’s how quickly this mortar mix sets. I probably could have eliminated them in less time, but I had a pretty good system. By the time I got the leftover mortar out of the bucket, cleaned my trowel, and mixed the next batch of mortar, I was able to remove all the spacers and reinforcements from the stone I had just placed and place the next one.
This is all I got yesterday because yesterday I had to spend part of my work day going to Home Depot to pick up materials and tools. I was hoping to do it on Wednesday so I would have more time to work yesterday, but it didn’t work out.

Throughout the entire process, I had my map on my phone so I could make sure the stones were placed in the correct order.

You can see that I have two very small sections that don’t have stone yet, and if you check the map above, you’ll notice that those are two areas with asterisks, which means I have to cut stones to fit in those areas.

One thing I learned the hard way is that I can only mix enough mortar for one stone at a time since it sets so quickly. It’s a little annoying, but once I butter the back of a stone, set it in place, and put the spacers and braces in place, the leftover mortar is already too thick. I tried mixing a larger batch so I could make two stones from one batch, but that resulted in the second stone being further away from the concrete than the stones around it.

When the mortar is freshly mixed, it has a very nice, workable consistency that allows you to press the stone into place and the mortar comes away from the sides of the stone. The crushed mortar can then be removed immediately before it sets. But once the mortar becomes too thick, which happens in less than ten minutes, no mortar comes out of the sides. So I couldn’t press that stone into the concrete as deeply as the ones surrounding it.
It’s not a big deal. Once you have the spaces between the stone mortar, I don’t think it will be noticeable. But I learned my lesson the hard way. I mix a small fresh amount of mortar for each stone. That makes the process slower, but the result is much better and the freshly mixed mortar is much easier to work with.
So that’s the progress so far. I’m so excited about how it’s turning out! I’m going to continue working on this over the weekend and we’ll see how far I can get before Monday. I have high hopes of being able to finish it, but I’m not set on that goal. Once I get to the crooked corner and have to join the stones on the front with those on the side of the porch, I anticipate I’ll be faced with a challenge that may slow me down a bit. But I’m determined to figure it out. I’m too excited about progress to let a potential future problem get in my way.
I mean, can we just take a minute and remember that I DID THAT? I made those fake stones from scratch. I made the textured silicone mats with the stones from our house…
I built the molds to fit around the silicone mats…

I poured each and every stone of concrete…

And they turned out almost identical to the original stones of our house…

And now, here they are on our front porch…
My whole plan is really working! Is there anything more satisfying than having a great plan (and one that probably sounds pretty crazy to most people) and seeing it actually come to fruition? Few things can compare to that feeling of satisfaction.
More about the exterior and patio of our house
see all exterior &
DIY garden projects

read everything outside and
garden blog posts

Addicted 2 Decorating is where I share my DIY and decorating journey as I remodel and decorate the 1948 upper that my husband Matt and I purchased in 2013. Matt has MS and can’t do physical work, so I do most of the house work myself. You can learn more about me here.

")

