
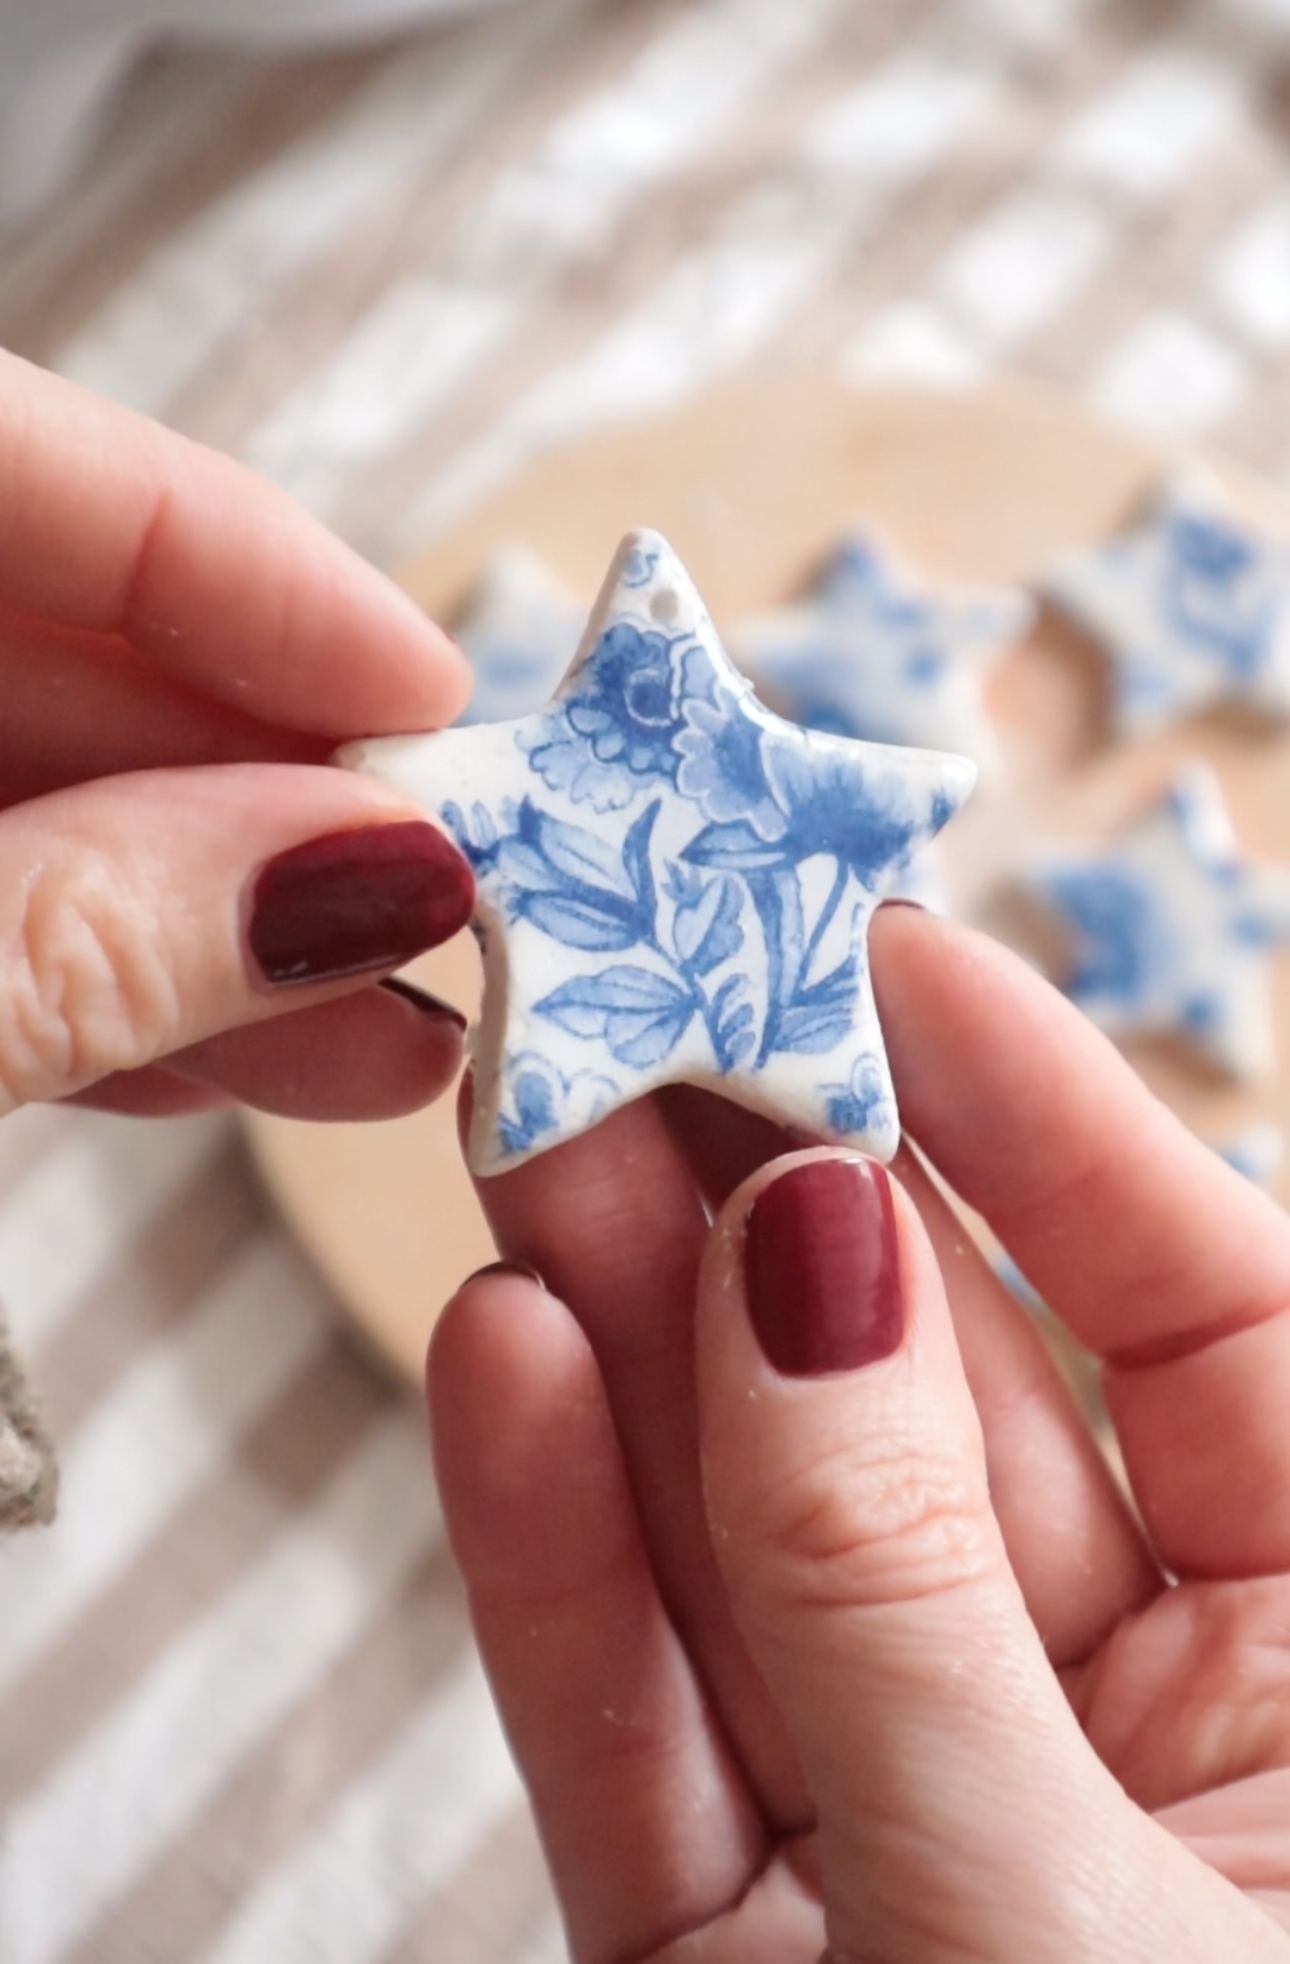
It’s that time of year to start your Christmas crafts again! I love a rainy afternoon craft and these festive air dry clay Delft stars are a quick and fun project that you can get the whole family involved in.
I love this Delft style pattern on the napkin I’m using. But you can choose any napkin that matches your holiday theme. Bold colors, stripes and even a tartan pattern for a low-cost Ralph Lauren Christmas look that has been trending everywhere this year.
All the links to the materials I used to make these festive air dry clay Delft stars are below. I always like to use DAS air dry clay because it shrinks less than other clays I’ve used, which is especially helpful in this project to prevent the napkin from wrinkling or pulling away from the clay as it dries. I also added some additional tips at the end of this post to help secure the napkin.
You can watch the quick video on Instagram with full instructions below.
You will need:
Air Dry Clay Delft Festive Star Instructions:
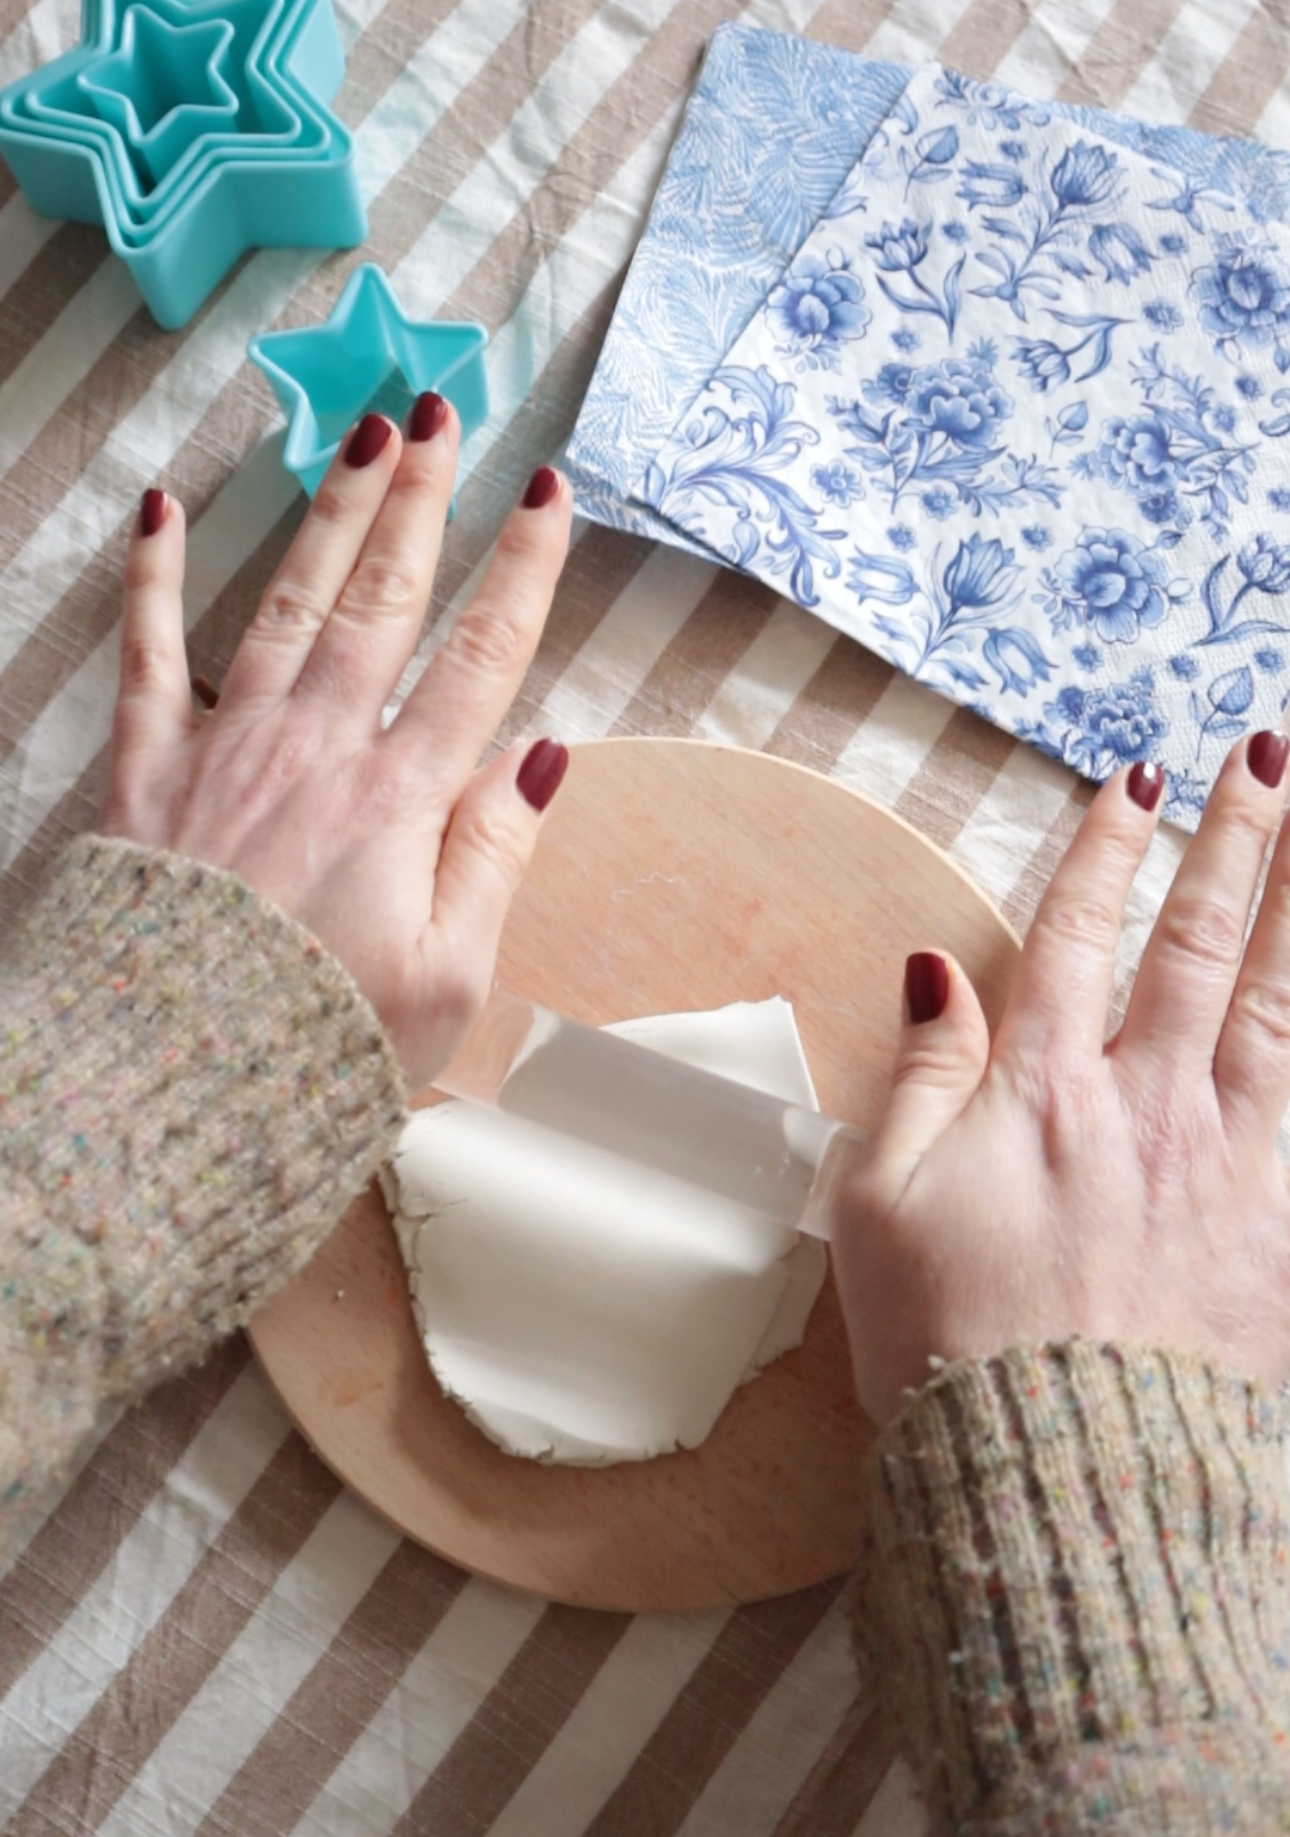
- Roll out the clay until it is about 5mm thick, making sure the surface is smooth and free of cracks. I’ve used a fairly small amount of clay here because I only have a small board to work with. Depending on your work space and how many stars you want to make, you can use more or less clay.
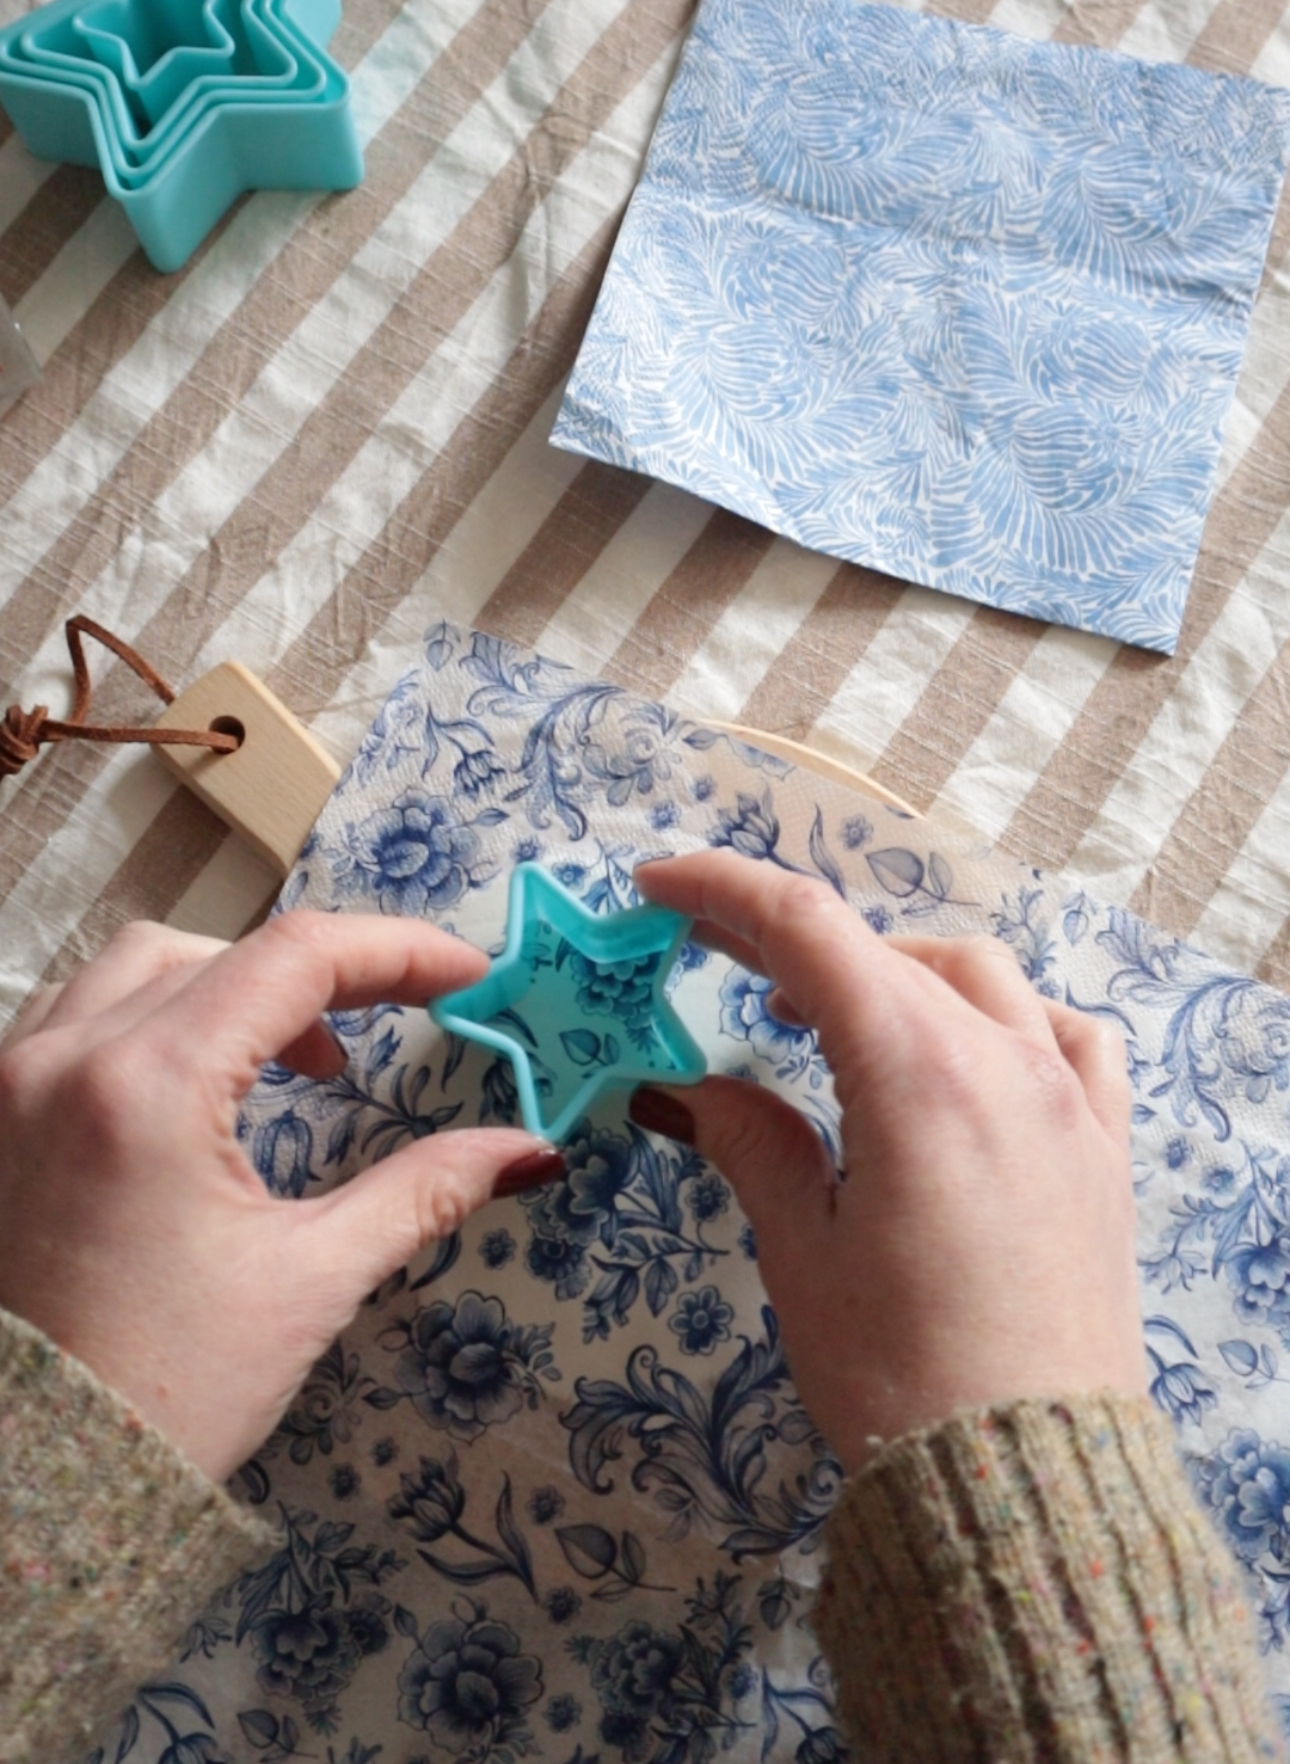
- Remove the patterned section of the napkin from any other layers and place it on top of the rolled clay. Press gently with your fingers and use the rolling pin to press the napkin firmly into the clay to secure it.
- Press the cutter into the surface of the clay using strong pressure to cleanly cut both the clay and the napkin. With a toothpick, make a small hole in the top of the star.
- Clean the edges with a cutter and let dry. Typically this will take between 12 and 24 hours.
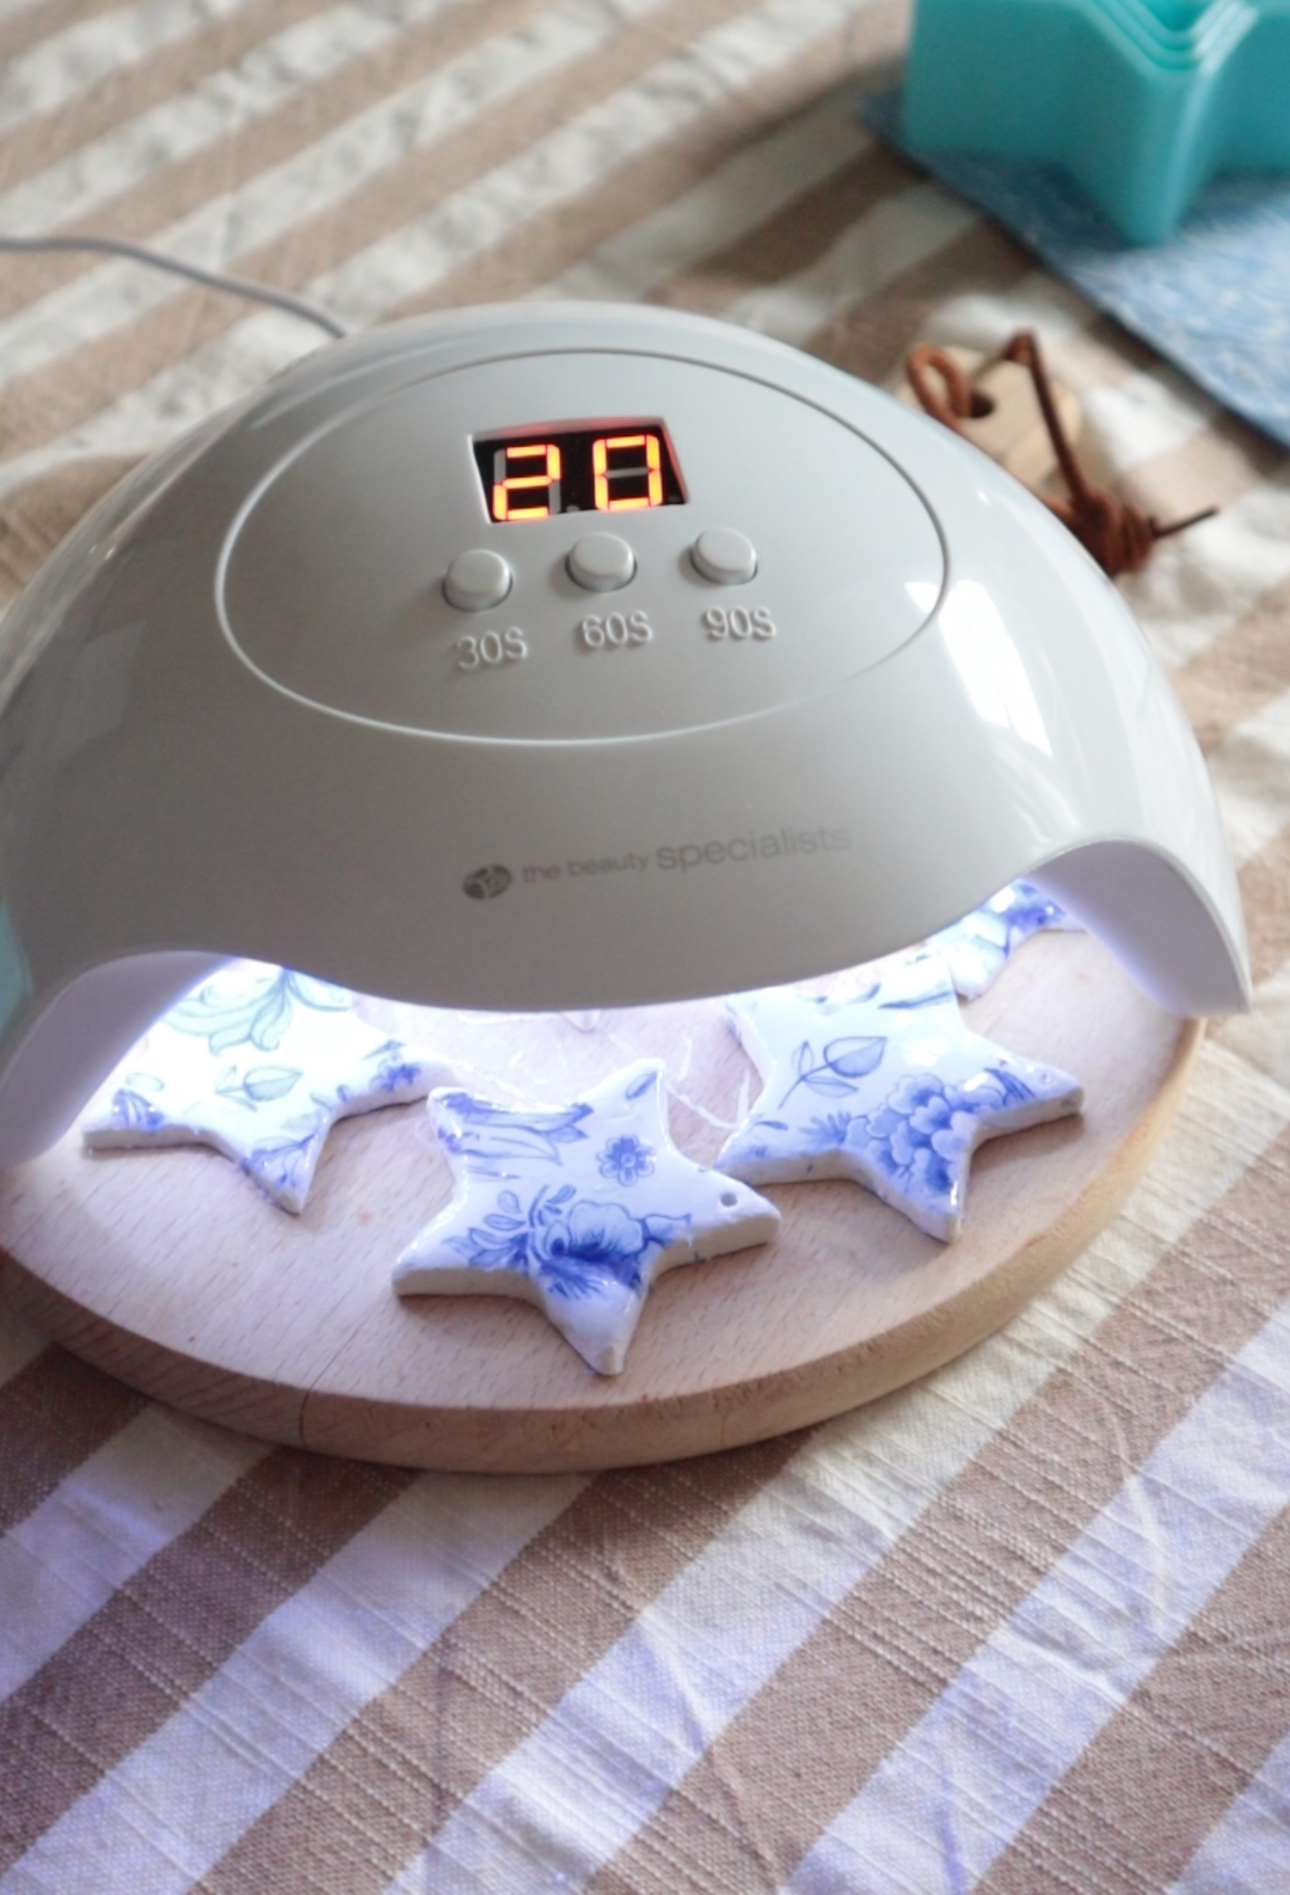
- Cover each star with resin that you gently spread over the surface with a cocktail stick, popping the bubbles. Make sure the hole in the clay star is not covered in resin before curing. Place the stars under the UV lamp for 60 seconds. You can use sunlight to cure the resin, but this will take about a day depending on the weather.

If you don’t want to use resin, you can use Mod Podge or PVA glue to protect the surface of the star and add a slight shine. This won’t create the shiny effect of resin, but it’s still a great option, especially if you’re crafting with kids!
If for some reason the napkins peel as the clay dries, you can set them to the wet clay using acetone nail polish remover. I’m not sure why this works, or if it’s meant to transfer the image rather than secure the napkin. But in the past, I gently rubbed the nail polish remover with a cotton ball and it worked to keep the napkin in place.
If you make these, tag me online @fallfordiy on social platforms. I would love to see them!


